The new version of Kali Linux 2020.4 is out for Pentesting lovers by Offensive Security with some cool and awesome features and tools. The latest version of Window 10 is available so for the hacking lovers we are with an amazing guide on How to Dual Boot Windows 10 and Kali Linux. Also, we will show you How to make Pendrive bootable.
So let’s make the machine more powerful with two of the most powerful operating system. Before we start the guide on How to Dual Boot Windows 10 and Kali Linux let’s first discuss some of the terms such as what is dual booting and how to make pen drive bootable.
What is Dual Booting?
So you are starting the journey in hacking or cybersecurity, all the machines are installed with a single operating system but different operating systems have different advantages so if there is a way to install more than one operating systems will give more power to us to switch between different operating and will make our work easier.
So if you want are willing to learn a new operating system then you can simply install two operating systems on your hard disk and side by side learn a new operating system easily. Let’s continue the tutorial on How to dual boot Kali Linux and Windows 10.
Also Read Top 5 Free Web Hosting Services in India
How to make Pendrive bootable?
If you are installing Kali Linux from USB then you need to make your Pendrive bootable then install the Kali Linux into your system. The simplest step to make Pendrive bootable is mentioned below you don’t need to install any other software you can make Pendrive bootable with simple commands.
Here are the Steps to make pendrive bootable
Step 1: The first step is to plug your USB into your machine and run the command prompt as Administrator.
Step 2: The second is to type diskpart on the command prompt.
Step 3: Then type list disk. This will list out the disk connected to your machine.
Step 4: Type select disk x (x will be the number mentioned in front of your Pendrive can be 1 if the only Pendrive is connected)
Step 5: Type clean and press enter.
Step 6: Now the turn is to create a partition type create partition primary and press Enter
Step 7: Now format the USB type format fs=ntfs quick and press Enter
Step 8: Then the last step is type active and press Enter.
Step 9: Type exit and press Enter and close the command prompt.
So let’s Dual Boot Kali Linux and Windows 10
How to dual Kali Linux and Windows 10
So let’s start the amazing work by starting dual-booting Kali Linux and Windows 10
Step 1: The very first step will be downloading Kali Linux from the official website you can download either x64 or x86 bit according to your system requirement.
Step 2: After successfully downloading the Kali Linux then you need to follow the steps to make Pendrive bootable by the steps mentioned above.
Step 3: Plug your USB and make your Pendrive bootable as mentioned above then extract the ISO file and copy the extracted files in the Pendrive.
Step 4: After the files are successfully installed then we need to create a partition in our hard disk of 15-20 GB to install the OS, so open disk management and create a partition.
Step 5: After creating the partition, restart your PC/Laptop and boot as USB.
Note: Make sure that you disable secure boot
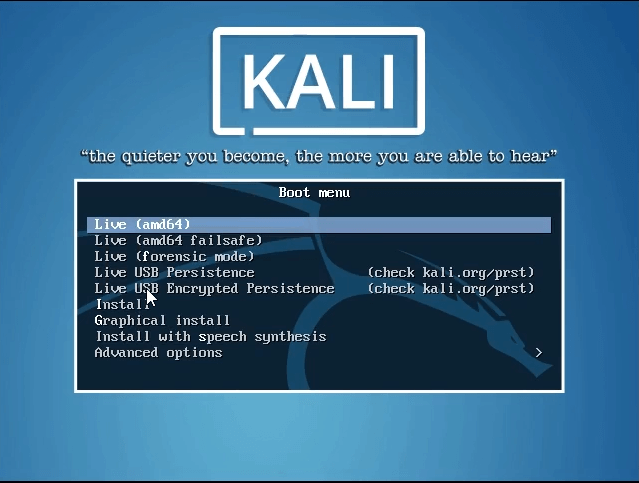
Step 6: After that you need to select Graphical install
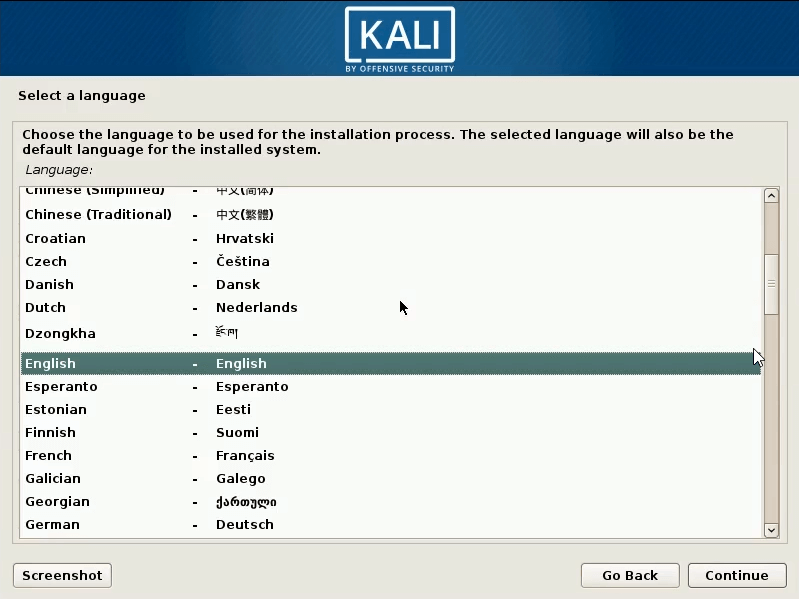
Step 7: After that select the language, country and Keyboard layout.
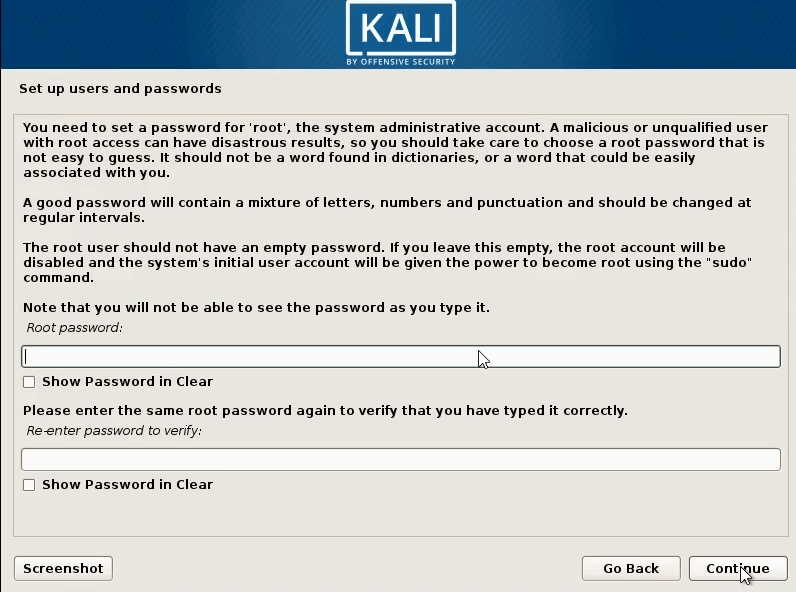
Step 8: Now it will ask for Hostname like username and set password for root user.
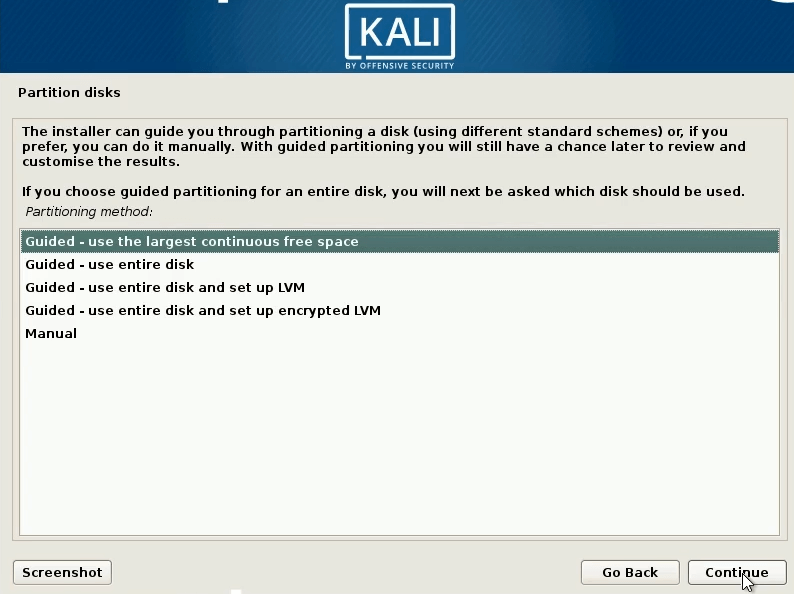
Step 9: Next, Choose the partition as manual ( This is the important step).
Step 10: Now choose the partition that we created before and press continue.
Step 11: Select the option Delete the partition and press continue.
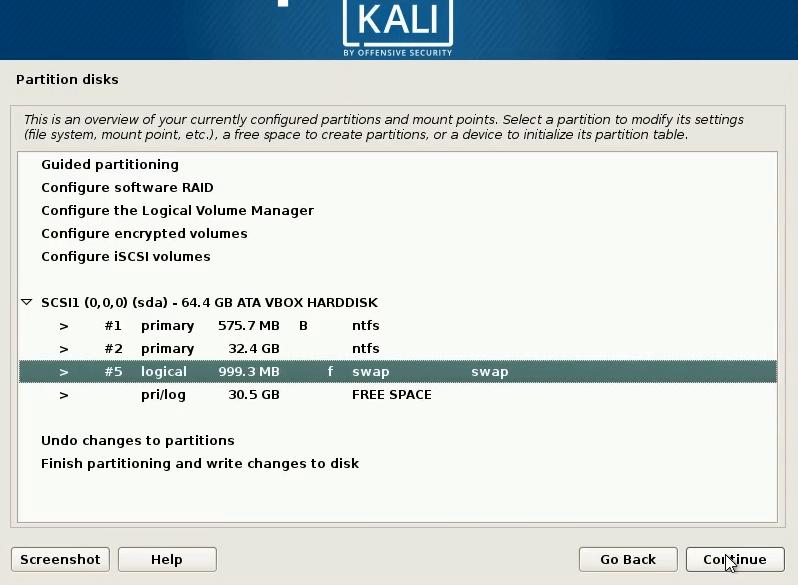
Step 12: Now after successfully doing the above step you will see that the partition is marked as FREE SPACE, choose the free space partition and press continue.
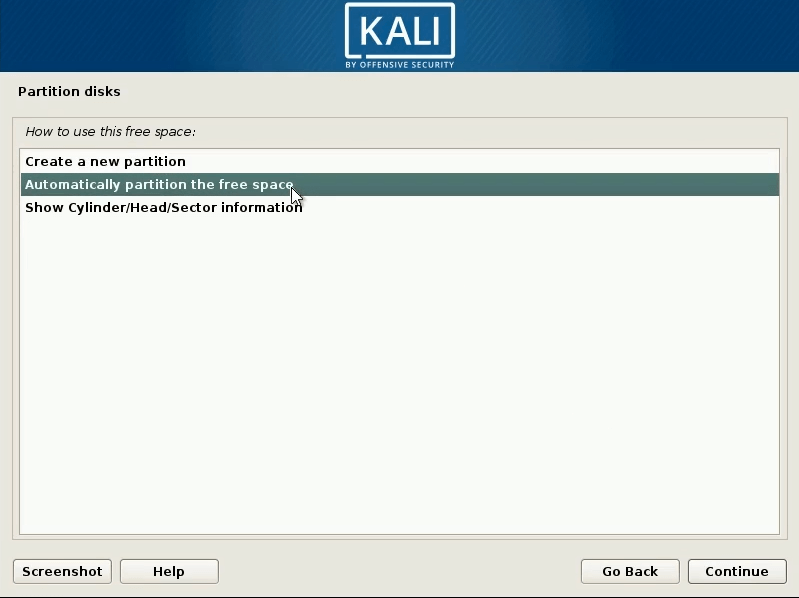
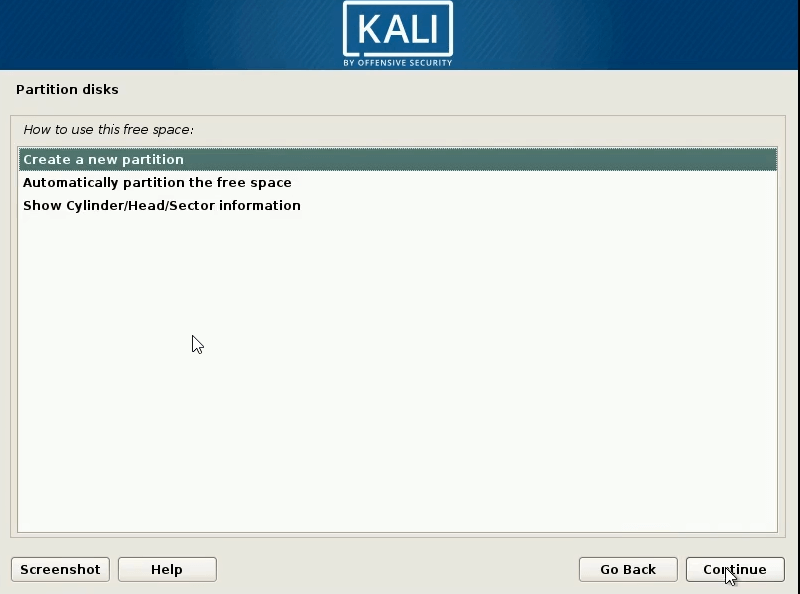
Step 13: Select the option Automatically partition the free space and press continue.
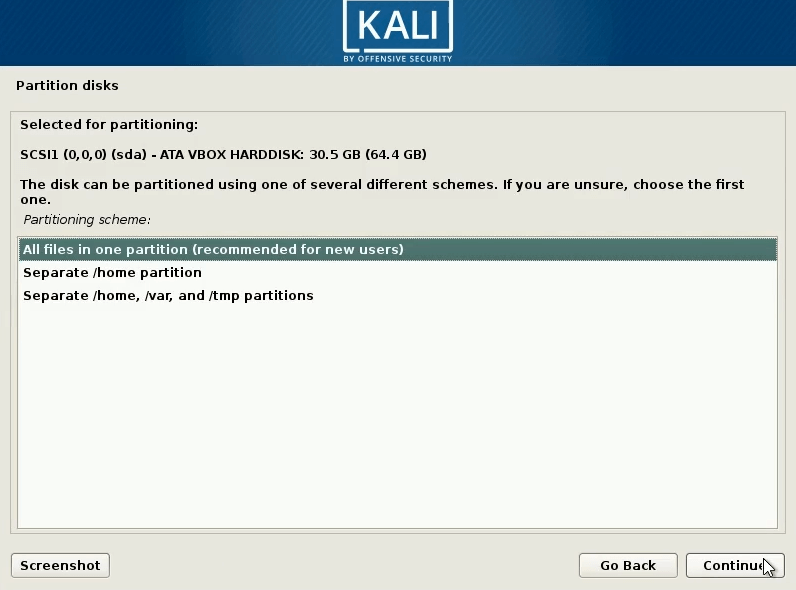
Step 14: Next choose All files in one partition and press continue.
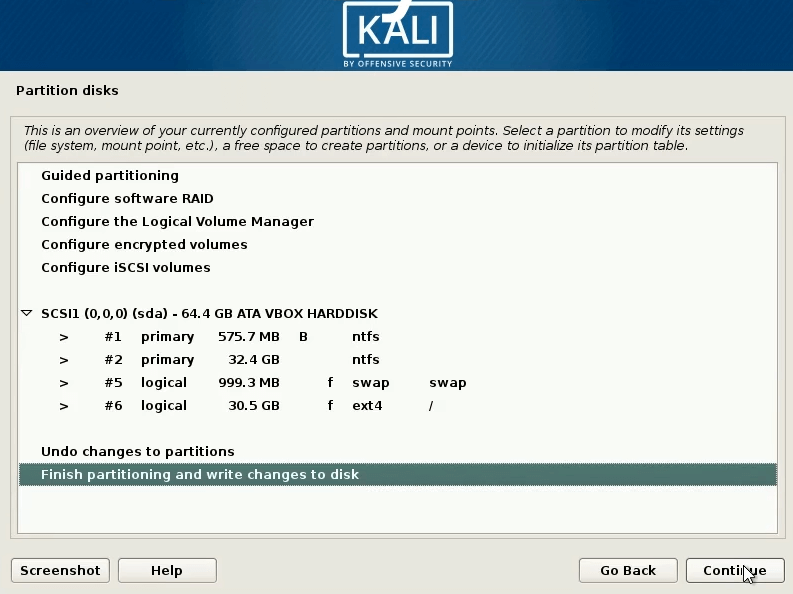
Step 15: Next choose Finish partitioning and write changes to disk and press continue.
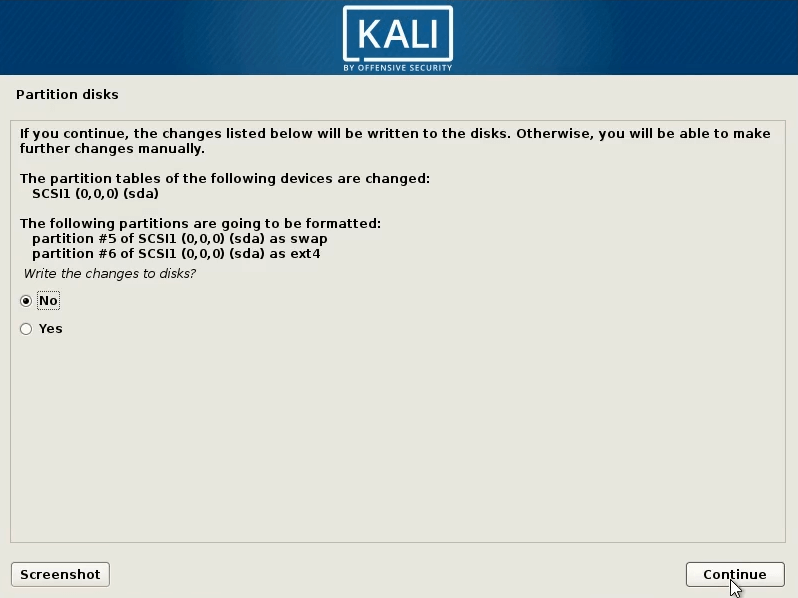
Step 16: It will ask permission to write changes in the disk. Choose “Yes” and “Continue”.
Step 17: Now wait for the Kali Linux setup to finish and in the middle it will ask for network mirror simply select “No. We can do that later.
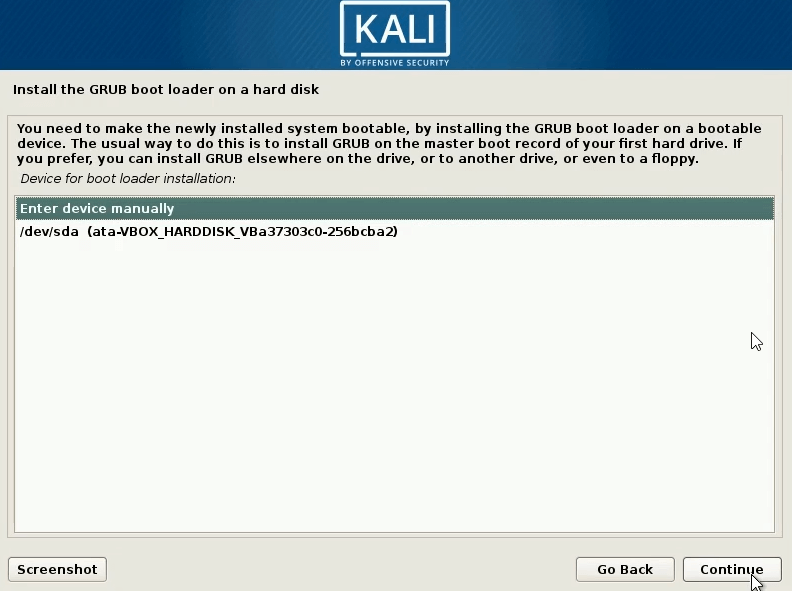
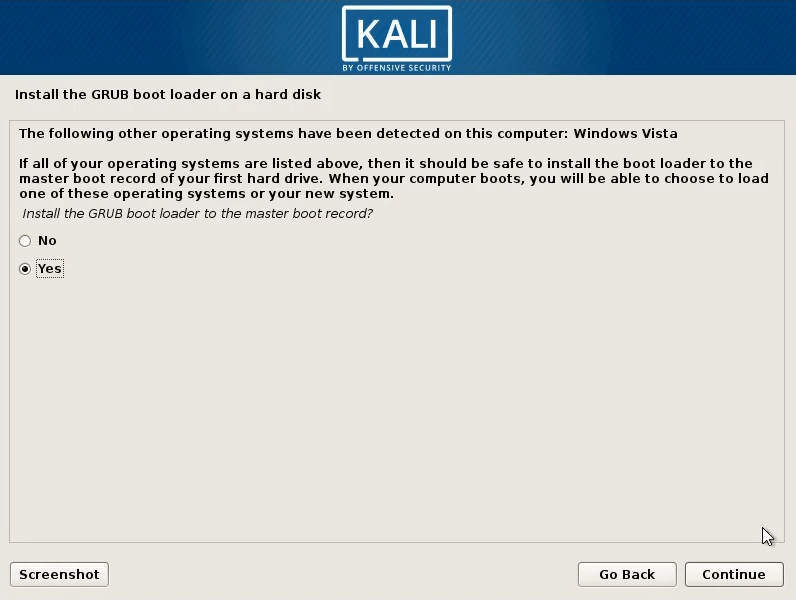
Step 18: Now it will ask for GRUB boot loader, choose “Yes” and “Continue”.
Step 19: It will ask where to install the Kali GRUB boot loader. Choose your hard disk, the second option. Remember only to choose your hard disk to install GRUB.
Step 20: After successful installation eject the USB and we are all set.
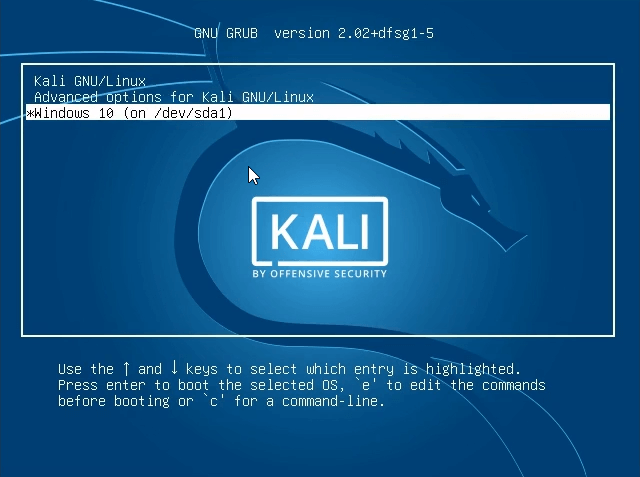
Now on the startup you will see the option of Kali Linux and Windows 10.
Is it safe to dual boot Windows and Kali Linux?
No doubt dual booting windows and Linux can increase productivity but sometimes there can be a reverse that would decrease the performance of the machine.
In most cases, there shouldn’t be too much impact on the hardware by dual booting. Both Linux and Windows use a handful amount of hard disk to improve the performance, but sometimes adding an additional operating system in the machine can reduce the hard disk space.
We hope that you liked the article on How to dual boot Windows 10 and Kali Linux. Visit for more Kali Linux related tutorials.


