Are you willing to dual boot your PC and if yes that you need to disable secure boot in Windows 10 or 8? Secure Boor is a modern technology that is built-in Windows 10 and 8 to make sure that the device boots only using trusted software by OEM. This time we are here with an amazing article on how to disable secure boot in Windows 10.
What is Secure Boot?
Before proceeding further let’s first discuss what is secure boot. As the name suggests secure boot is a security feature that safeguards the boot-up process in order to make sure that the device that you are using such as Laptop/PC boots only using trusted software by an Original Equipment Manufacturer (OEM).
The main job of secure boot is to prevent unsigned UEFI driver or bootloader to load during the startup process. You might be thinking what is the use of this, the main purpose of this is to prevent unauthorized access to your device and steal your data. But one of the disadvantages of this is that it prevents running two operating systems at the same time. Not to worry if you want to dual boot then this article will help you to disable secure boot in Windows 10/8.
How to disable Secure Boot in Windows 10?
So let’s see how to disable secure boot in Windows 10 in order to disable secure boot follow the steps that are mentioned below for Windows 10 or Windows 8.

Step 1: In the start menu search for the advance startup there you will see the option for Change Advance Startup Options.
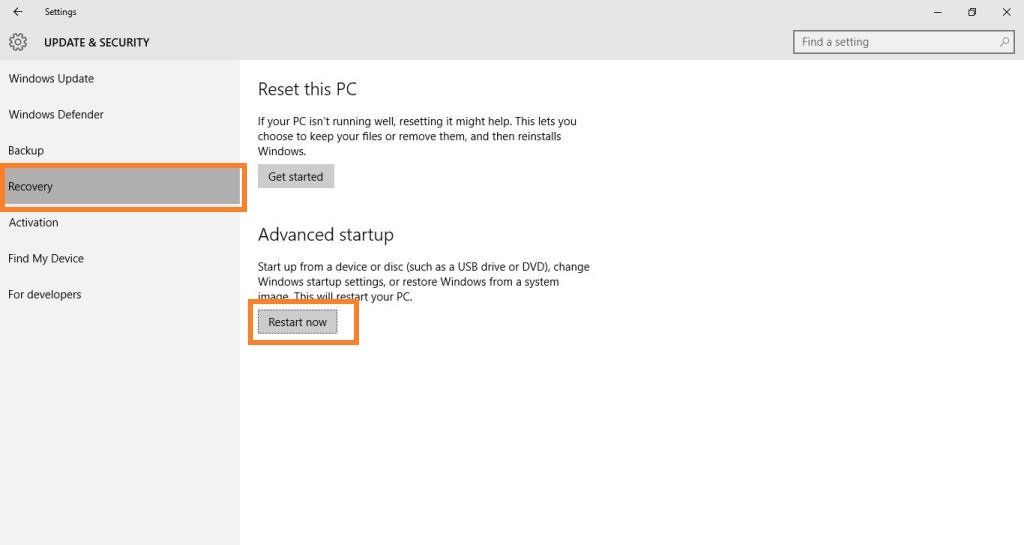
Step 2: After clicking on the option you have to go to Recovery option and click on Restart Now
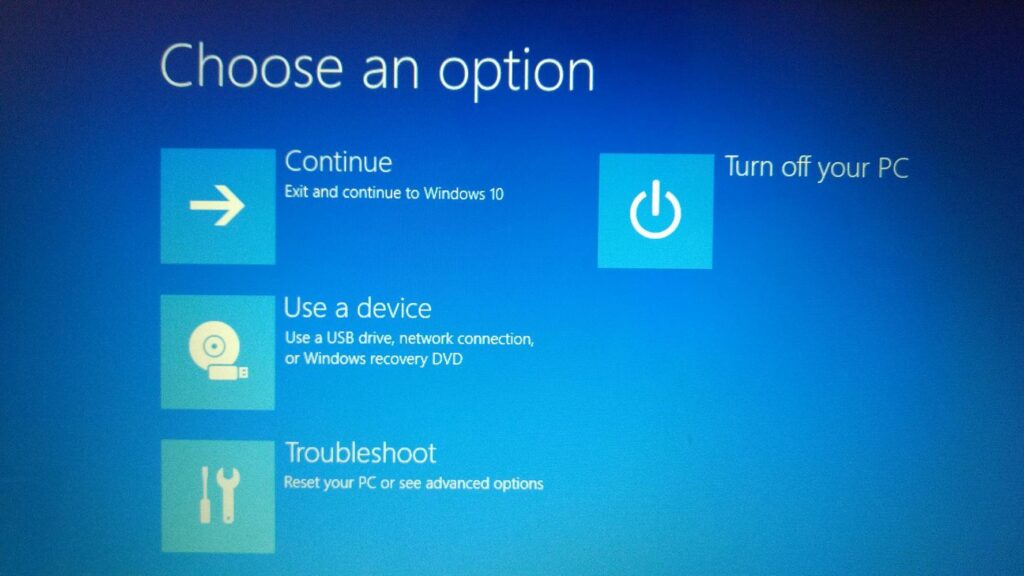
Step 3: After that your PC will be booted in the advanced mode, there you will see several options like Use a device, troubleshoot, continue. You have to click on troubleshoot option.
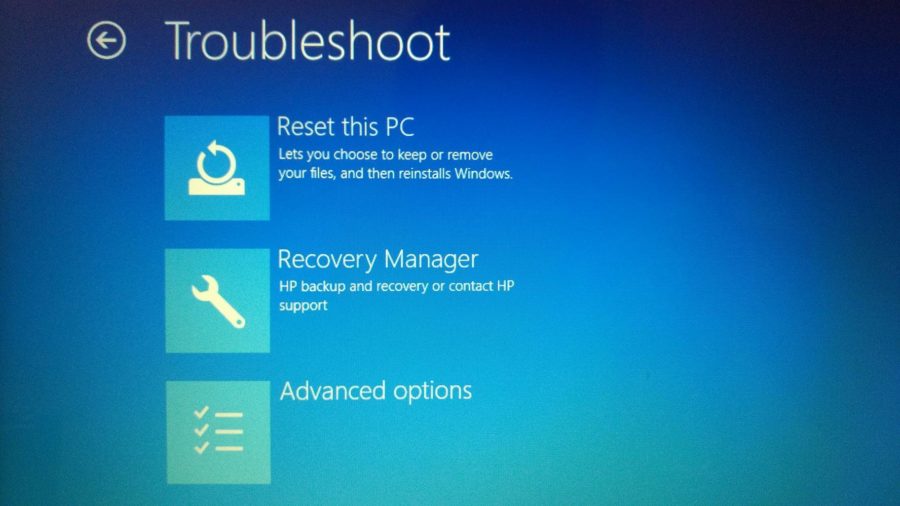
Step 4: After that you have to click on Advance options.
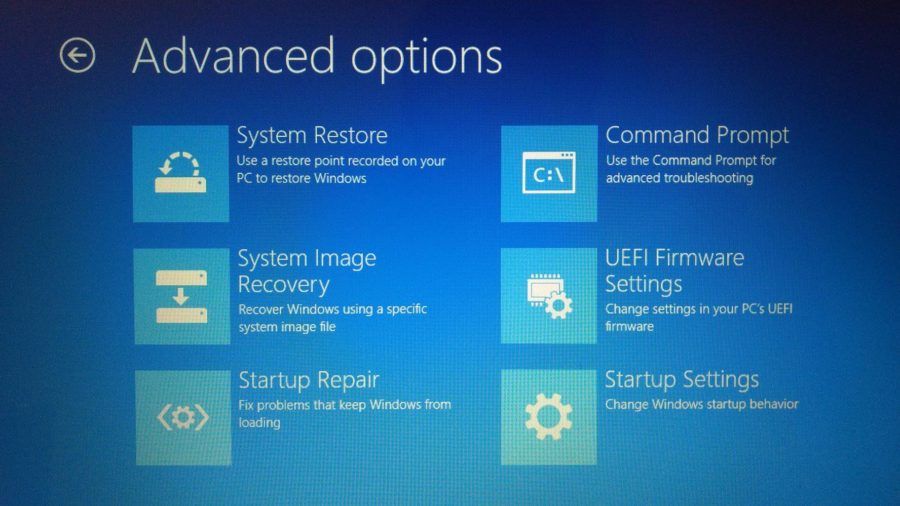
Step 5: After clicking on advance options click on firmware UEFI firmware settings.
Step 6: After that you will be booted into the BIOS of your system and there you will see several options.
Step 7: Now go to the security tab in the BIOS setting.
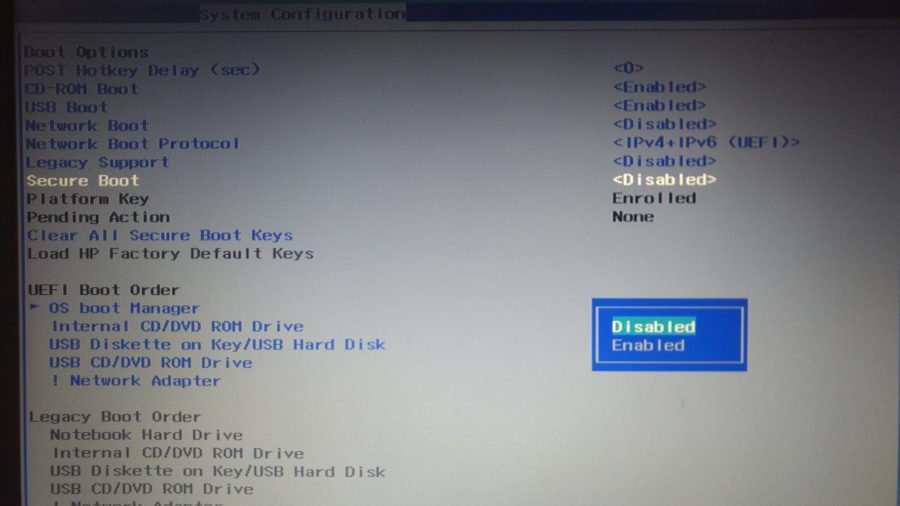
Step 8: There you will see the option secure boot and there mark it as disabled
Step 9: Press Enter.
Step 10: Save it and exit the setup
Time needed: 10 minutes.
All Steps in a Nut-Shell
- Step 1:
In the stat menu search for the advance startup there you will see the option for Change Advance Startup Options.
- Step 2:
After clicking on the option you have to go to Recovery option and click on Restart Now
- Step 3:
After that your PC will be booted in the advanced mode, there you will see several options like Use a device, troubleshoot, continue. You have to click on troubleshoot option.
- Step 4:
After that you have to click on Advance options.
- Step 5:
After clicking on advance options click on firmware UEFI firmware settings.
- Step 6:
After that you will be booted into the BIOS of your system and there you will see several options.
- Step 7:
Now go to the security tab in the BIOS setting.
- Step 8:
There you will see the option secure boot and there mark it as disabled
- Step 9:
Press Enter.
- Step 10:
Save it and exit the setup
Also read: How to Dual Boot Windows 10 and Kali Linux
Now the secure boot is disabled and you can proceed with your work. You can also follow up the same steps to enable the secure boot.


