

It is very common to take a screenshot while using gadgets and if you are a PC user then it becomes very easy to take screenshots or to capture the entire screen. There are three popular methods through which you can take screenshots of your screen either fully or partially. There is no need to install any third party or extra software or tool to take a screenshot. So, without wasting time, lets head back to the methods and introduce you to the ultimate guide to take screenshots in Windows 10 PC.
Highly Popular: How to take scrolling screenshots on Android and iPhone?
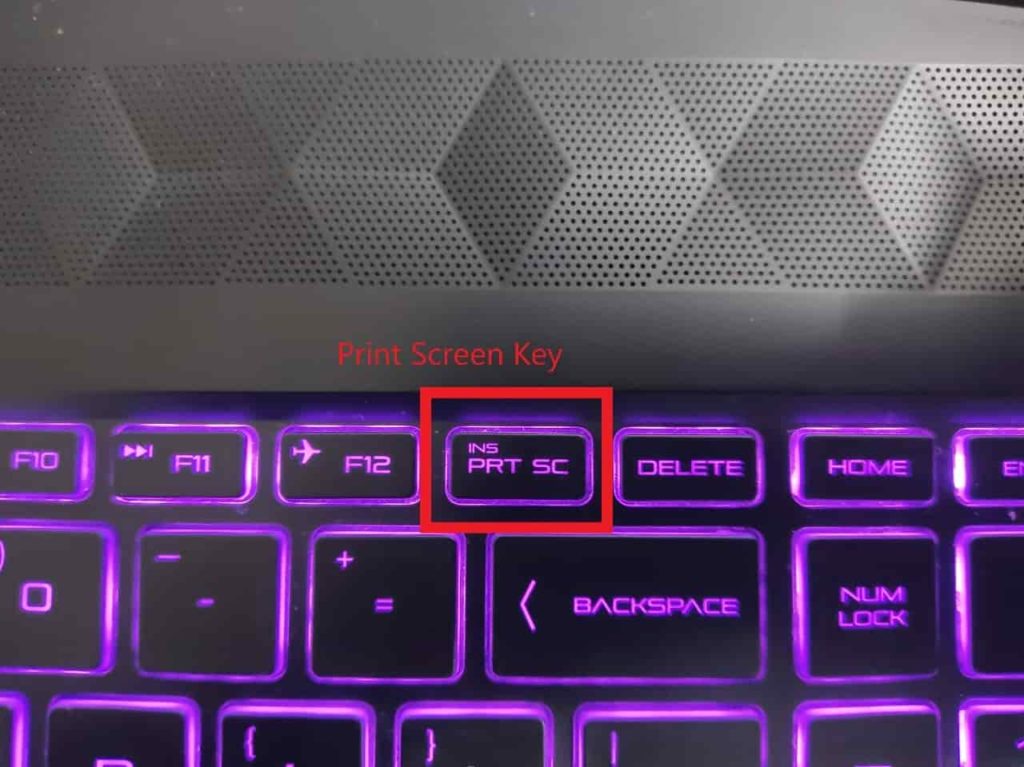
Method 1: Take screenshots with the Print Screen (PrtScn) key
In this method, you can save the screenshot as a file or you can copy the image with the help of the “PrtScn key,” by using the combination of other keys. The PrtScn key is available on the top lane of your keyboard with other function keys.
- How to save your screenshot as a file?
- If you want to take the screenshot and save it a file then you need to press the following combination “Windows key + PrtScn.”
- Doing this will save the entire screen as an image file and will dim the screen for a while.
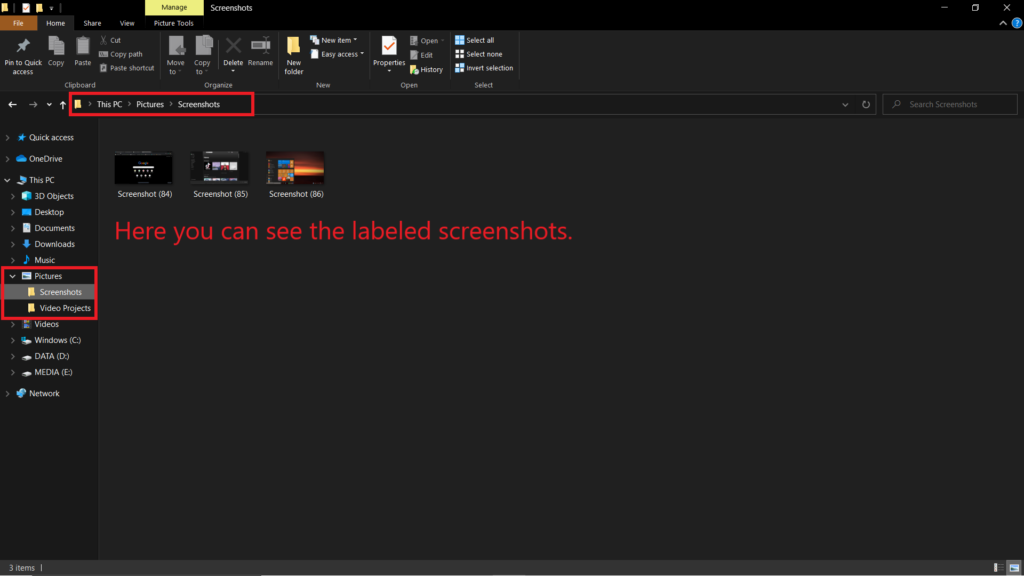
- To view the saved image you need to go to the “Screenshots Folder,” saved in the “Pictures Folder.” Here the screenshots get automatically labeled.
- NOTE: In some computers or laptops, you may need to press the “Windows key + Ctrl + PrtScn” or “Windows key + Fn + PrtScn” keys instead. Check your laptop’s manual for more information.
- How to take a screenshot without saving?
- If you want to take the screenshot without saving it then you need to press the “PrtScn,” on your keyboard.
- It will copy the screenshot of your screen without saving it.
- Now, you can paste this copied screenshot in any of the image editors, word processors or any other program.
- NOTE: In some computers or laptops, you may need to press the “Alt + Fn + PrtScn” keys instead. Check your laptop’s manual for more information.
- How to take a screenshot of only one window?
- If you want to take the screenshot of a particular tab or window, then you need to press ” Alt + PrtScn.”
- It will copy the screenshot of your current window without saving it.
- Now, you can paste this copied screenshot in any of the image editors, word processors or any other program.
- NOTE: In some computers or laptops, you may need to press the “Alt + Fn + PrtScn” keys instead. Check your laptop’s manual for more information.
- How to take a screenshot of a part of your screen?
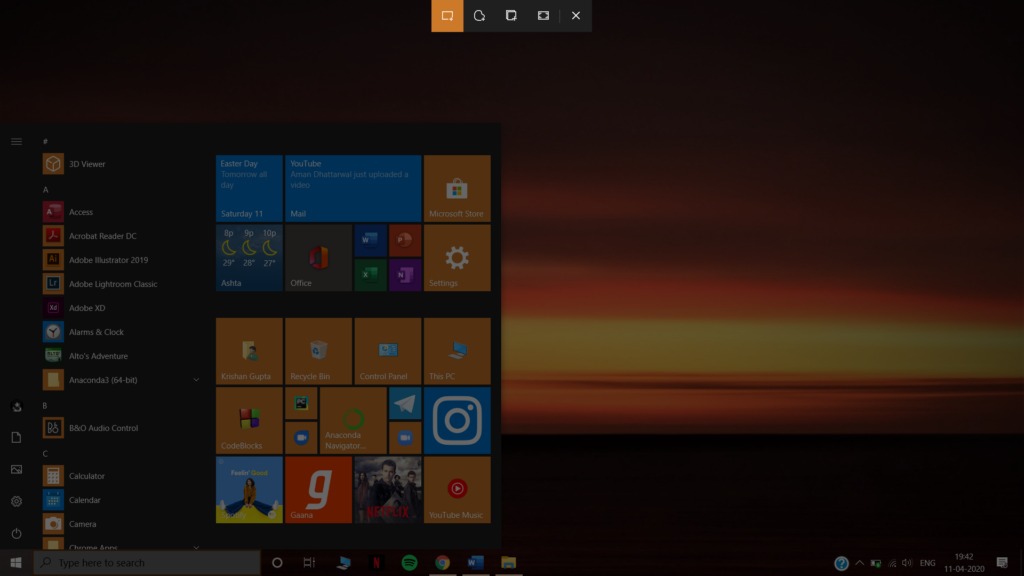
- If you want to take the screenshot of a part of your screen then you need to press “Windows + Shift + S”.
- After pressing those keys, the screen will get a little dim and the mouse cursor will change into the selection cursor. Then you select the particular part of your screen.
- It will copy the screenshot of your current window without saving it.
- Now, you can paste this copied screenshot in any of the image editors, word processors or any other program.
- NOTE: This method only works if you’re the latest version of Windows 10 installed, called the Windows 10 Creator Update.
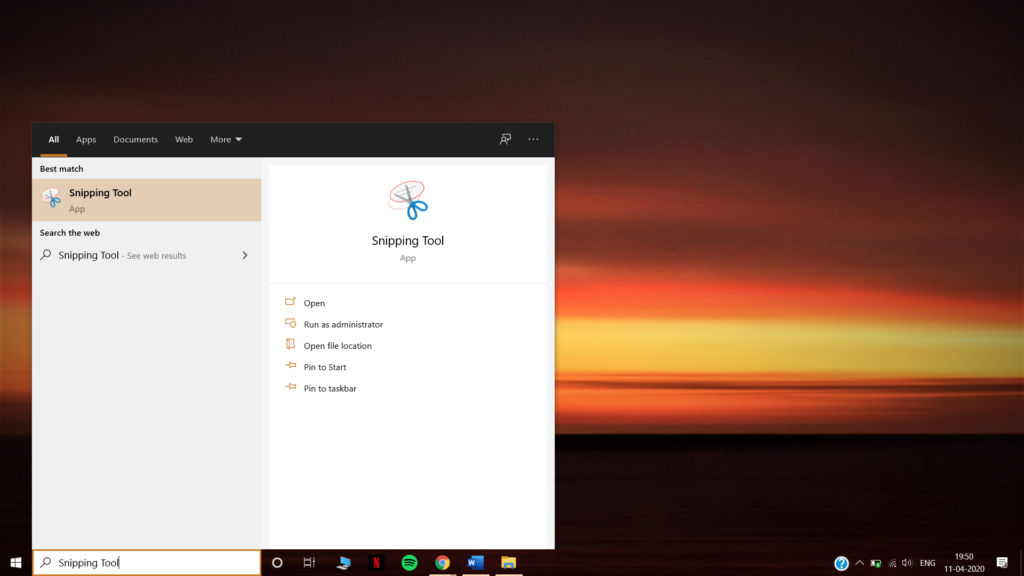
Method 2: Take screenshots with the Snipping Tool
Windows includes a feature called Snipping Tool, through this you can save the screenshot. You can follow the following steps to use this method:
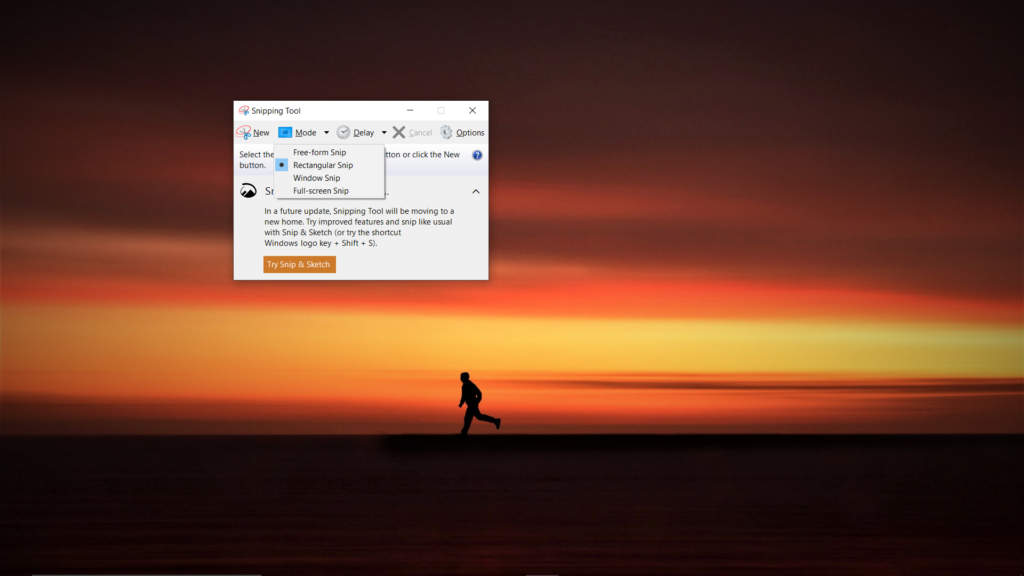
- Search for the “Snipping Tool” in the start menu and then launch it.
- Now choose the type of snip form the “Mode menu.”
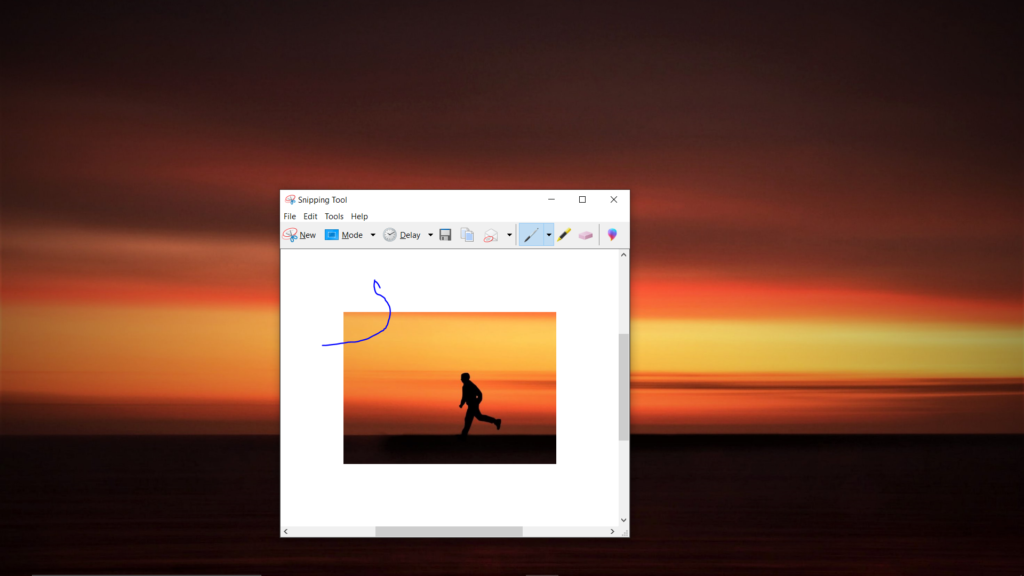
- Then click “New,” this will freeze the screen and the selection cursor will appear. Then you can choose the region that you want to save.

- Then the selected region will appear in the “Snipping Tool Window.”

- If you want to, you can use the drawing tools available there to modify your snapped window.
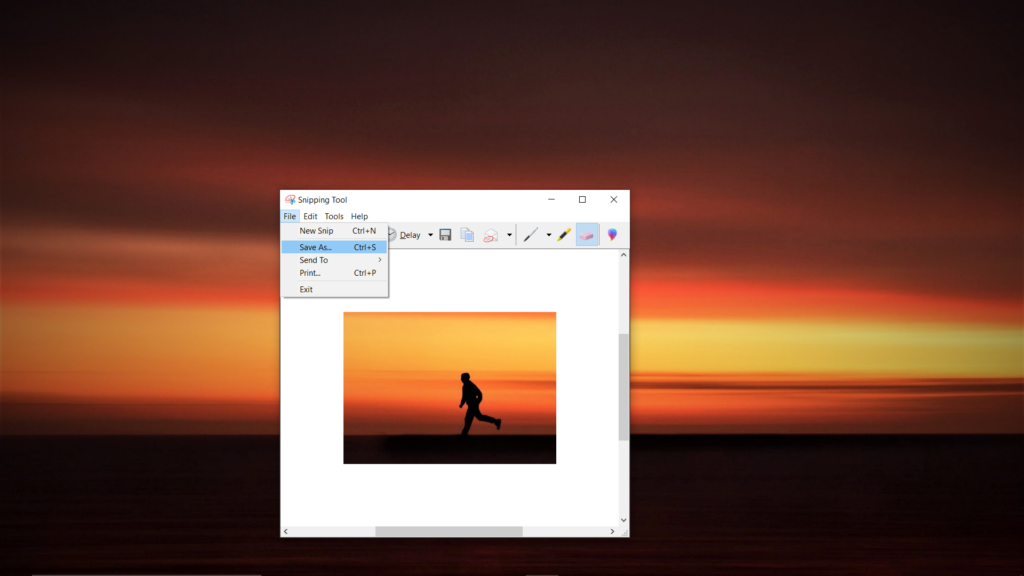
- For saving that picture, go to “File” then click “Save As” and save that at your favorite location.
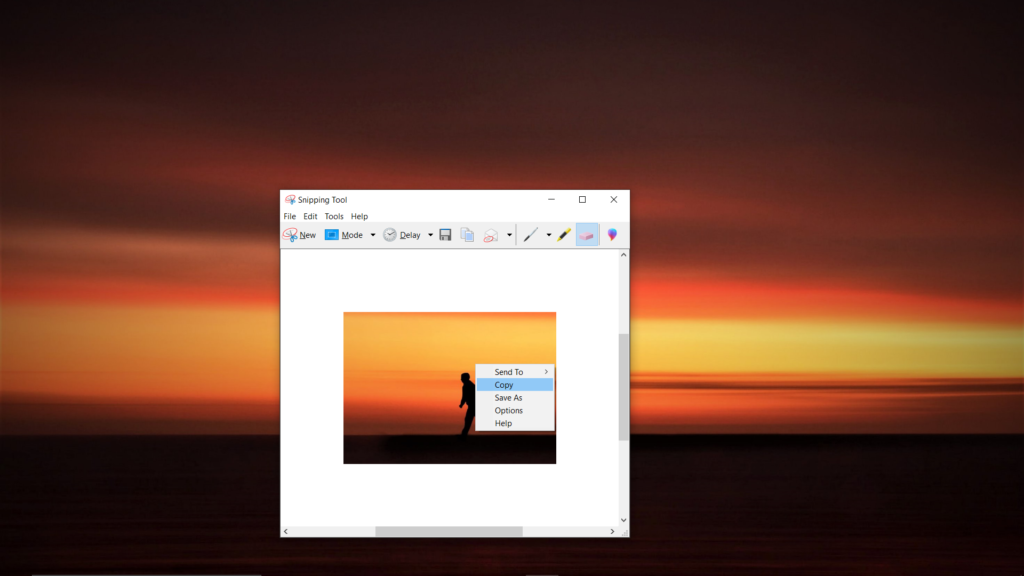
- You can also copy the image through the Snipping Tool Windows.
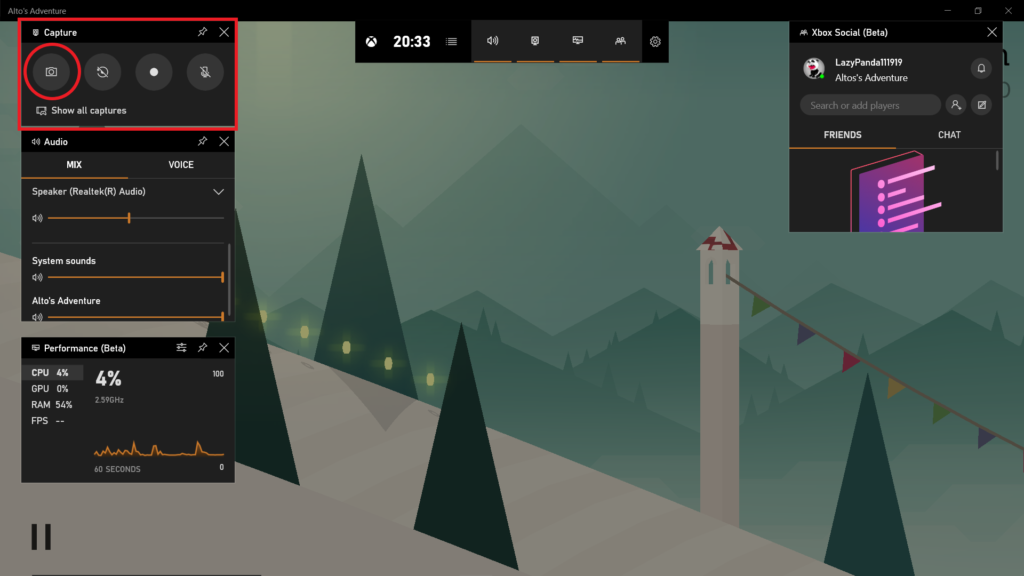
Method 3: Take screenshots with the Game Bar
This method is useful if you’re playing any game. You can follow the following steps to use this method:
- While playing any game, press “Windows Key + G,” then the “Game Bar” overlay should appear.
- Then click on the camera icon to capture the screenshot of your game.
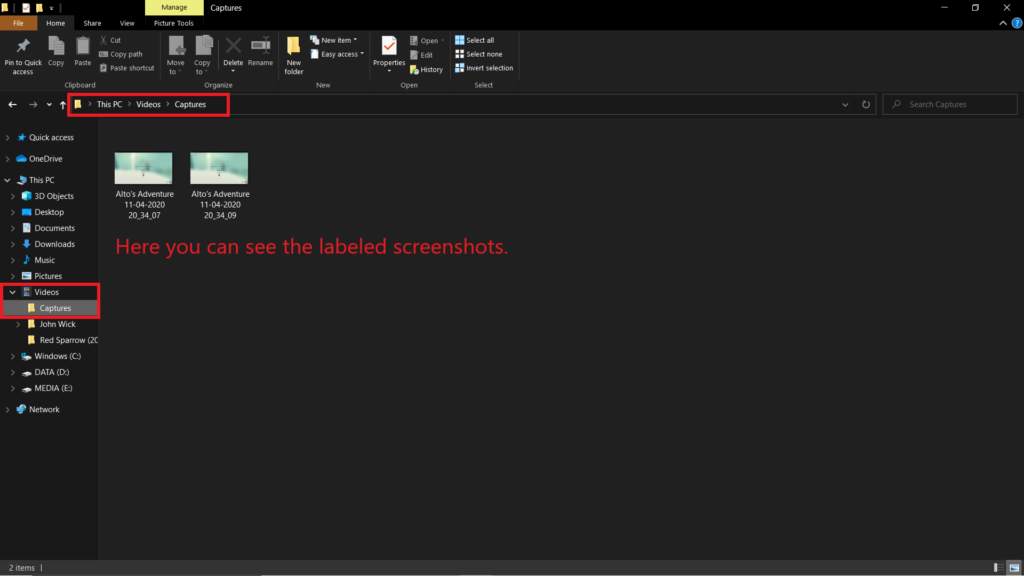
- To view the saved image you need to go to the “Captures Folder,” saved in the “Videos Folder.” Here the screenshots get automatically labeled.
Well, these were some of the methods through which you can capture the screenshots. If you find any method useful for you, then do leave a like and share it with your friends.


